Showing posts with label KKCenterHk. Show all posts

Friday, 17 April 2015

Art Deco: Third Times The Charm?

So I have a cold...again. This is my THIRD cold THIS YEAR. I know exactly who I got each cold from, but at the same time I probably should be treating my body a bit better so I'm not so susceptible. I really wanted to do my A-Z challenge yesterday, but I just feel too blah to do anything fun with my nails. So here is a mani I did a few days ago using my Catrice polish I just reviewed.

Since I have been wanting to do more nail art the past few weeks, but I have been super busy, striping tape, has coming in handy. It can be quite time consuming, depending on the design, but I find that when using it for accent nails you can get away with doing more creative designs without taking forever.

I wore Catrice's Oh My Goldness for a day, but after that first day, I just knew I had to add some art deco to it. It just felt like it was calling out for it. The designs weren't hard to do, but they were a bit tricky trying to get everything even when using my non dominant hand. The rhinestones are from KKCenterHk. I think it's safe to say that I am really loving this manicure.


Friday, 25 July 2014

Christmas in July/Fargo(FX) Nails

Today I have two versions of one manicure. The second manicure is actually my original idea, but because this is a review for KkCenterHK, and I know they use some of the photos after, I wanted to give them a cleaner option :P

For this manicure I used these water decals from KkCenterHK. They are a bit festive, but they worked perfectly for what I had in mind. These were east to put on, the standard cut, take off from plastic, dip in water and slide the decal off. My only complaints are they did seem to take a bit more soaking in the water before the decal would slide off. The package also did not come with any instructions. Now the second problem wasn't a problem for me as I have used water decals before, but it can cause issues if you haven't. You should also know that the background on these decals is white. So no matter what colour you put them over anything between the red lines that look white, will turn out white. That being said they make it clear on the website.

The first version of this manicure is simple. Just the water decals, and two plain white nails accented with gold studs. The second version is the Fargo(FX) version based on the shows posters. In the poster as you can see it's a cross stitching of a man who has just been shot. And his blood spells out the name of the show.


By the way if you haven't see the show Fargo, go and watch it NOW(It's Friday so you have no excuse). It's AMAZING! And if you have seen it, isn't it AMAZING!?!?

ETA:
This is the poster/banner the Fargo nail art was based on

If you would like these decals they retail for $3.80 USD here on their website. And if you want a discount(who doesnt?!) use can use our 10% off code 'varnishedvalkyrie'.

Saturday, 19 July 2014

I'm Going Slightly Mad(For Gradients and Studs)

So long story short(I'll get into the longer version later), I've been sitting on this review for KkCenterhk for a couple weeks now because I had been doing a Fringe Festival. Because of that I either had no time to do nail art, and when I did I didn't bother with it because I don't like wearing nail art on stage during more important shows. Even really bright colours can be a distraction. So I am FINALLY getting around to it.

So today I have these 1.5mm circular studs from KKCenterHk. They are probably the smallest studs I currently have. I thought they were really easy to apply, but maybe it was because they were large enough to easily pick up, but just the right weight that they weren't too heavy or too light to pick up. They are listed at $2.50 USD on the website for 50. I decided to count, and there was approximately 100 in my bag. I really really loved these, and the only thing I would change is how many of them came in a pack. They are so small that it's east to go through a large portion of the studs at once. This could just be the stud hoarder in me talking.

The manicure as a whole was inspired by this manicure by Oh My Gosh! Polish. As you can see I made mine slightly different. I wish I was better with dots though. I find it so hard to get them all even. I also need to work on clean up for when I do gradients. Acrylic paint does not come off the same way polish does when using a small brush around the cuticles. Ah well you can't win them all.

If you would like this product(or anything from their site), remember to use our 10% discount code: varnishedvalkyrie.


Wednesday, 7 May 2014

Reduce, Reuse, Recycle!

*Singing* Be a friend to the earth, cuz you know how much it is worth. It's worth more than gold. It's worth more than jewels. So help clean it up, AND DON'T BE A FOOL. Be a friend to the earth.

I kid you not that was a song my class wrote when I was maybe 8. I figured because of the title this would be one of the only times I would get to share this just missed out on the top 100, songs of the 90's you might have missed.

Anyways this post in no way apart from the song has anything to do with me being a friend to the earth. Not that I'm not her friend, I just prefer calling her my acquaintance. I mean we get along but I wouldn't call her a friend yet. Back on topic! My nails! So I had a really hard time wanting to take off the last mani. I ended up wearing them for almost a week. By the time I took remover to my fingers I had already taken off the studs the night before. When I took them off I though "You look fine", so I  kept them. Long story short the black studs in this manicure are the exact same set of studs I had used in my previous gradient and black manicure! I figured why not use them again if I'm only going to get 50. Not only that but they hold up just fine, like they have never been used before!

Do you guys reuse nail art supply's like studs? I like saving larger studs and of course stuff along the line of charms.


Monday, 5 May 2014

I've done it again! Another set of "Never want to take you off" nails!

I'm super excited with these nails, because I am super happy with how they turned out. They are amazing and they really are pure magic. There is nothing you can say that will change my mind.

So I came up with this idea when I got these 8mmx3mm black diamond studs from KKCenterHk. First I painted my nails white and then did a gradient(Purple, pink, orange, yellow). That alone wold have been pretty, but as I was feeling daring I added the studs, AND black lines(and on some of the fingers triangle to fill in some awkward space at the bottom). They turned out perfectly.

I applied the studs like I normally do, by dipping a dotting tool in a bit of clear polish and sticking them on my nail. Even though these studs were larger than normal studs I have used in the past they were just as easy to pick up. My one mistake was sticking them on with nail glue that you had to brush on. I did this because they were larger and I really wanted them to stay on, but when the glue dried it became a bit visible. Next time I will either use glue that you can put on in tiny droplets or just clear polish. On the first night I had these on I actually used gloves in the shower, because I was finger detangling my hair. While I did have two coats of top coat on I was still scared they would snag in my hair and pull off. That being said I don't think I had anything to worry about.  Here I am 4 days and 3 showers later and they are still going strong! ETA: Right before I posted this I actually picked the studs off. They are in good enough shape that I can wear them again.

The studs retail for $4.26USD and I think they are great for anyone who loves nail studs. And if you would like a discount our code is 'varnishedvalkyrie', but I'm not sure if it has been extended yet. It should be soon if it does not work right away.

 You can kind of see the glue in the photos, on the middle and ring fingers. The light is reflecting off a bump the glue created in between the black lines.

 There are around 50 in a package.
 This is how I detangled my hair in the shower the first night I had these nails on. Rubber gloves that I taped around my wrists.

*Product sent for honest review

Friday, 2 May 2014

More Bunnies(but of the dust kind) - My Sneeziest Manicure Yet!

One thing I haven't done in a while is just a really weird manicure. I actually wasn't planning on doing this but other ideas fell through.

1)When I originally chose the eyeballs for review from KKCenterHk I had a REALLY cool idea. It's a shame I completely forgot what it was.
2)My next idea was to add them to some cat water decals. Because cats with googly eyes are AMAZING! But the cats were to small and it was less funny when it was a cat body with an eye head.
3)My next idea was add them to water decals I had of random thing like lips, sunglasses and mustaches. Because googly eyes on inanimate objects is EVEN MORE AMAZING! Buuuttt I could not for the life of me find them.

So I ended up with these Dust Bunnies. Made from actual dryer lint! It was easy to place the lint on, and I did it in a similar manner to when you would use flocking powder. Then I put 2 dots of nail glue and stuck the eyes to them using a dotting tool dipped in clear polish.


The googly eyes are 3mm in diameter. They are the smallest you can get. I honestly think )for me at least) any bigger and they would be overwhelming. I stuck these on with nail glue because I don't think these are something I would top coat, as they are tall(3 maybe 4mm). They are also a bit harder to pick up then most studs, because when you lay them out they almost always end up on their sides. I also found it easier once they were on the nail to press them gently with my fingers. You don't have to worry about ruining the rest of the design because again, they are so high. On the website it says each jar comes with 40pcs, but there has to be at least 150 in here, if not a bit more.

If you would like your very own jar of eyes, head on over to KKCenterHK where they retail for $5 USD. You can also try and use our discount code(listed on the left sidebar), BUT I'm not sure if it has been extended yet or not. I'll place the code in here when I know for sure.

Wednesday, 5 March 2014

What's that saying again? Ah yes! 5th times the charm...

So last Friday I left my phone at the boys place and have yet to pick it up.  Only now do I realize how often I check my emails, as I keep reaching for it.  And yes I know I can check my laptop, but that means changing accounts which is a (vary minor, but still very real) pain in the ass.  I also miss my Candy Crush.  I have been on Level 500 for over a month now, and I fear my cousin will have over taken me when I get back.  I feel we have some sort of unspoken Candy Crush war going on.  I am ok with that.

Today I have some nail art foil from KKcenterHk.  Now I have tried nail foils before but it has never been successful.  Turns out you need a special glue!  Which I am pleased to say KKcenterHk was kind enough to send me.  But despite this it still took a bit of trial an error.

Attempt 1: I didn't want to use up any of my new insane holo foil, so I decided to experiment with the KKcenterHk glue,  and some older foil that I had received from elsewhere.  Left the glue on till it was no longer white, and it worked like a charm.

Attempt 2: Tried to do some cool claw looking reverse french with the KKcenterHk foil.  Epic fail.  I did it the same way I had the previous time but it would NOT stick.

Attempt 3:  I thought maybe it was a drying time thing.  I read that leaving the glue on for a least 5 minutes was good.  So I tried that and used my older foil and the KKCenter Hk foil.  Old foil, perfect.  KKcenterHK, Nadda.

Attempt 4:  I'm getting frustrated by now.  I leave it on for just over 5 minutes this time, and the one big change was I ripped it off like a band aid.  Success!  Add SH quickdry topcoat.  I get's all weird and sticky and the finish get's messed up.

Attempt 5(which is what you are going to see):  I left the glue on for 5 minutes in this cool claw like pattern, placed the foil on top, rubbed it on with a cotton ball and my finger, and ripped it odd quickly.  Tried SV as a topcoat this time.  SUCCESS!  *5 minutes later*  "Where did the holo go?!?!?!?!?!?!?!?!?!?"

Left hand, with Seche Vite :(

Right hand, no topcoat :)

So as I learnt, different foils may act differently.  My older foil easily came off when rubbed on the nail, and carefully removed.  Where as this one needed to be taken off quickly for it to stick.  Also I now know that top coat does not always play nice with foils :(  Anyone know of topcoat that plays well with foils?


Over all I really like this and am much more pleased with this mani then I was the first time I tried foils.  The top coat issue stinks, but hopefully I can find something that works well with foils.  Because one I got the hand of applying foils, it's pretty easy and fun!  If you would like this you can head on over to KKcenterHk.  If you want just the foil it's $6.92, the foil and a small glue $8.86, and for the foil and a regular size glue $10.80 (All in USD).

Monday, 10 February 2014

Love is Blind...Colourblind!: Having fun with my new dotting tools!

So I wasn't intended on doing Valentines nails but when I thought of this I had to do it!  Here's how it all started.  I have a fear of going blind(So romantic), and when I say fear, I mean terror.  The fact that for one hot moment they though I had glaucoma did not help it.  I decided to go online and look at forums that discuss this fear.  After doing that for a while for some reason I had this urge to look up "What do people see when they are colourblind?" And I started looking at these comparison pictures between normal vision, and different types of colorblindness, and it's kind of insane.  Then out of know where I thought of the saying "Love is Blind" and then I thought "Colourblind"  Random, I know.

OR maybe it's my subconscious speaking and this whole thing really about interracial relationships!  I don't know why my subconscious would do that though.  Trust me, the conscious part of me could have told you how they can be fab.  And you know the old saying "Once you go black, you may or may not go back.  It all really depends on the person, and what they are like on the inside.  Like their personality and blood type. You can never have too many kidneys."


Anyways this mani took FOREVER to finish. Apart from the bright orange on the index finger, EVERY other colour had to be mixed(acrylic paint) because I didn't have the colours I wanted in a cream form.  The actual shapes(X❤OX) and the dots themselves were easy to do.

Decided to mattify it.

AND one more fun thing.  Even though I'm sure my colours are off, if this is correct everyone with perfect colour will be able to see everything that's going on on my nails.  If you can't see red or green, the only thing you will see is half a heart.  And completely colorblind, you'll just see a bunch of dots.

This whole mani was done with my new dotting tools from KKcenterHk.  They are double ended and come in 5 different sizes.  One side of the dotting tool has varying sizes, and the other side the sizes are equal.  The blue dotting tool is the same size on each end.  These were easy to use, but in my opinion you only really need three of them.  Small, medium and large.  It's very easy to get the sizes in between with those tools alone, you just have to use more or less polish or paint.  But overall I'm glad I have these.  Prior to this I had two dotting tools, and they were both the really small ones.

If you would like a set like this for yourself, head on over to KKcenterHk where it retails for $7.99 USD.  And use our 15% discount code(which is only valid for another month): varnishedvalkyrieevent15off


*Product sent for honest review

Thursday, 14 November 2013

Majestic Cheetah Nails: Please note that this review is written to the tune of The Lion Kings's Circle of Life. Feel free to sing along with my new lyrics. Backing track provided. (Part of me wishes I was joking)

When I first got these water decals to review for KKCenterHk all I could think for some reason was Lion King.  So logically I did the review in song along form.  Feel free to just read it, but if you would like the full Lion King on Broadway experience scroll down to the instrumental track and click play or go here and open YouTube in a new page.

Nants ingonyama bagithi Baba
[Sithi uhm ingonyam]

Nants ingonyama bagithi baba
[Sithi uhhmm ingonyama
Ingonyam]

Siyo Nqoba
Ingonyama Ingonyama nengw' enamabala [Chant repeats]

[Start singing at 0:51)

From the day this arrived on my doorstep
I'm thinking, wow this looks real fun
Even though the site, says these are leopards
It's clear they are, majestic cheetahs
There's ten in a set for each nail
Although there was no instructions found
But I've done this before
Cup of water galore
Let's begin and let the magic take hold

These are water decals
And they slide right off
Off the paper back
But don't forget
An important step
Remove the plastic*
It protects it
Protects it from harm

Music break...If someone is singing the other party for you they can continue with the Ingonyama Ingonyama nengw' enamabala's.

[Start singing again at 3:07]

These are water decals
Put them over white
They are sort of clear
And when you're done
Use some acetone
To clean up the edges
These are well priced
Just two fifty four**

IF YOU SUNG THIS GIVE YOURSELF A ROUND OF APPLAUSE!!!


 Messed up the last guys face because I fiddled too much with it.


*The plastic from on top of the decals.
**USD

Again if you would like a set of these they retail for $2.54 USD.  You can also use our 15% discount code 'varnishedvalkyrieevent15off'.

*Product provided for honest review

Tuesday, 12 November 2013

Black on Rainbow: My first rainbow gradient

For the first time in a long time I did something the other day that I hadn't done in years.  I fell off the bed.  I wasn't laying down either, I was sitting at the edge and gracefully toppled over backwards.  Luckily I put my hand out and caught myself on a step stool I had.  I ended up breaking my thumb nail on my left hand when I caught myself.  But looking back I'm grateful.  It was either me, or the nail.

My design today was inspired by these nails by More Nail Polish(who was inspired by other blogger, who were inspired by other bloggers :P).  I decided that since I had these black circular rhinestones from KKCenterHk's Candy Series I would do it in reverse.  Black on rainbow!

I'm honestly pretty bad at gradients and rarely do them.  This is maybe my 4rd attempt.  I painted all the colours(Red, yellow, green, blue, and purple) on a makeup sponge and dabbed it against my nails which already had white polish on them.  It was MUCH easier then I the past few times I did it.  And although it's not perfect I still think it looks good. The only thing I would do differently next time is do the colours in reverse so the red isn't near the cuticles.  It was flippin hard to clean!

Then I  easily placed the solid black rhinestones.  They are 2mm in diameter and they say they include around 100 rhinestones.  If I were to take a guess I would say there was well over 100 in the bottle it came in.  I used 20 and you would never know I used any if looking in the container.  My only "problem"(and reason I only did the row of black as an accent nails) was it's really hard too see what side was the top or thw bottom when you were picking them up.  The colours in the Candy Series are solid colours unlike their other rhinestones, which are transparent, and have silver bottoms, making the bottom easy to identify.   It also probably doesn't help that my eyes are bad.

Overall I really did love these rhinestones!  If you want some head on over to KKCenterHK they also come in MANY other colours.  They retail for $4.50 USD, but you can use our 15% coupon code 'varnishedvalkyrieevent15off' and get them for a bit less :D

What do you think of my gradient?


You have to look close to see if you are picking it up from the top or the bottom.

*Product sent for honest review

Tuesday, 15 October 2013

Self Defense Against Fresh Fruit Nails: Ft. My new brushes and a story about how I can now say I picked up John Cleese's fresh fruit

So if there is one thing you should know about me is that I love comedy.  One day in the future(as opposed to the past) I would really love to have my own show on television.  There are so many different comedians who influence me in different ways, but one of my biggest influences would have to be Monty Python.  I have always been in love with their unique brand of humor.  I have been lucky enough to have seen John Cleese perform live twice!  Once only a few weeks ago :)  Not only that but I was helping out at Just For Laughs this year and I got to go pick up his fresh fruit!  I didn't get to give it to him but still!

I sort of had these nails in mind for a while and I thought this would be the perfect time to try out my new from KKCenter HK. If you don't know what Self Defense Against Fresh Fruit is your life is missing something.   I will help you fill that void.  SDAFF is a classic sketch by Monty Python that was originally in their show Monty Python's Flying Circus.  It's exactly what it sounds like.  The instructor(John Cleese) is teaching a class how to defend themselves against fresh fruit(I used China Glaze Sea Spray as my base as it was close to the colour of the shirt he's wearing in the sketch).  All the fruit on my nails are fruit that are either mentioned(Segmented grapefruit, red cherries, apple, grapes) or shown(banana).  In his demonstrations every time someone attacks him with fruit he kills them in a violent, and unnecessary way(16 ton weight and gun).  Finally there is one student(Eric Idle) who insists on being taught how to defend oneself if attacked with a pointed stick.  Hence the pointed stick on my ring finger.  I suggest you watch the whole thing for a good laugh.  I'll post it at the bottom.


The brush set comes with 15 pieces. For this I used 5 different brushes.  Striping brush, a detailing brush, a dotting tool, and two that I don't really have a name for.  These were really easy to use.  The brushes were firm, but not stiff.  I am completely enamoured with the detailing brush.  It is perfect for not only smaller details, but also for writing on you nails.  I wish the set came with another dotting tool.  One that was maybe bigger.  As you can see my grapes are pretty small(which works for grapes), but that's about as big as the dots get.  These brushes are made out of synthetic material, which is why I suspect they say don't use polish remover on it.  This isn't a huge deal for me because when I do stuff like this 95% of it is usually acrylic paint, which easily comes off with water.  That being said I did use a bit of nail polish, and that was a lot harder to get off with just water.  So I did use remover to clean it in the end and the brushes are still fine.  If you do this be careful.


If you would like a pack of these brushes you can get them from KKCenterHk's website.  They retail for $15USD.  But you can get them for less if you use our KKCenterHk 15% off discount code! 'varnishedvalkyrieevent15off' (Valid till March 11th 2014).

So any Python fans out there?!?!  This is SOME of my collection of Monty Python stuff(Everything from the entire 16 DVD box set of the Series, to records).  And below that is the fresh fruit I picked up for John Cleese :P


Ps.  Here's the sketch.  WATCH!

Tuesday, 3 September 2013

KKCenterHk Full Nail Water Transfer Stickers: They're MELTING!!!

So first of all if you haven't it would be great if you could go over to the previous post and answer those questions.  My friend and I need to figure out what people like and what people don't like on vlogs.  And for the record the reason we want to know this isn't as obvious at it may seem, but I'll get into details later.  But I think(I hope) you guys will all love what we have in mind :P

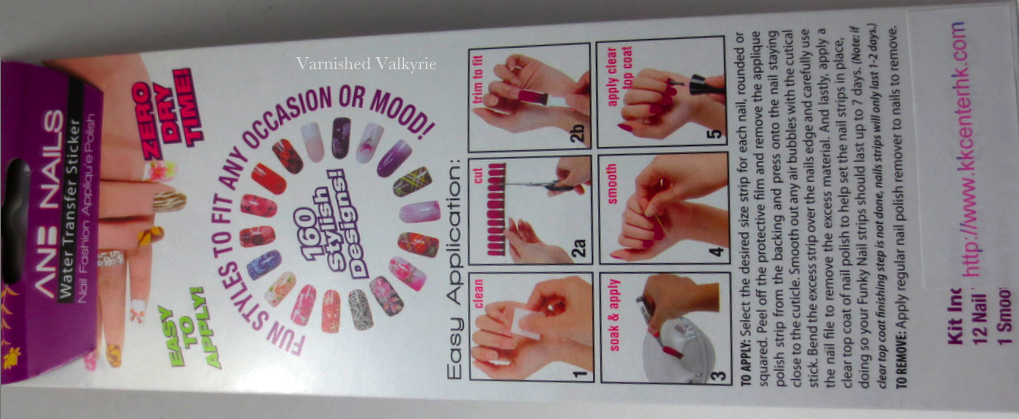
Now today I have water transfer sticker from KKCenterHk in Illusion.  It's a bunch of black and white swirly illusion patterns.  It looks pretty cool both up close and far away!  Now I decided to try these because I had already given water decals a go, but nothing that covered the whole nail.  These looks like normal nail polish stickers/wraps, but they apply just like the smaller nail art decals.
 
 Came in a set of 12 and had a petite nail file


On the back of the packege there is a set of instructions, both in pictures and written out.  This was a bit confusing.  1)The photo wasn't clear that after you dip it in the pater you then take it off the back.  2)The written instructions didn't even mention putting it in water.


Here are some things I noticed about these.  Once you get them off their backing after dipping them in water they apply just like nail polish appliqués or stickers.  Although because of the water when you put them on they may be a bit slippery a first.  Something else I noticed was while they were very easy to put on you had to be VERY careful, as they are VERY delicate and tear easily.  Especially when you file the tips off.  So a trick I learnt for getting rid of the tip was acetone.  You can watch these melt with acetone.  I would cut the tip as close as I could to the nail, and then get a brush soaked in acetone.  I then would place the brush on top of the portion hanging off my nail and it would literally just melt away.  On the melting topic, you can also do clean up with this like you would for polish.  But be careful because again these are delicate and it's easy to melt away too much.   Also there is a clear border around the actual design, but that's easy to melt away too.


Something I noticed after a day of wearing them was they had started to crack.  Even though I had added a layer of topcoat(Sally Hansen) like they suggested, I added another coat that seems to be holding strong.


While these aren't as durable as some of the other nail wraps and polish appliqués I've tried, and the designs aren't as crisp, I would completely buy them again for a special night out.  They have some pretty unique designes.  I would just use 2 layers of topcoat next time!

If you would like to try these out you can find them over at KKCenterHk where they retail for $8.52 USD.  And get 10% off with our coupon code 'varnishedvalkyrie'!

*Product sent for honest review

Sunday, 14 July 2013

3D Lego Nails!

Ugh As soon as clicked on the new post button, the new post page loaded and then my internet immediately cut out!  It obviously was down a few days ago when the power went our but for the past few weeks it's been finicky in general.  Anyways I hope you had a great few days.  I had a new first!  A man followed me the other day!  Luckily is was by a busy road, and when I lost him I went and hid in a store for a bit.

Now onto things that aren't creepy men!

I've been wanting to do 3D nails for a while now but wasn't sure what I wanted to do.  I knew I didn't want anything too over the top, or something that would interfere with me doing things.  So a few nights ago I was looking at The Daily Nail's site, and I came across these Lego nails.  Not only did I think they looked nifty, I thought I could do something like that but actually make it 3D.

First I painted my nails the base colour of whatever the block was going to be.  Next I placed between 2-6 pieces of KKCenterHk gold circular glitter down depending on how many bumps the block was going to have.  After that I got out some nail glue, placed a tiny bit on each piece of glitter, and stacked another piece of glitter on top of the original piece.  Then I repeated that step so each of the bumps consisted of 3 pieces of glitter.  When that was done I got out my acrylic paint and painted over just the bumps, focusing on the sides.  Following that I went over the entire nail with the acrylic paint (you may need to do this more than once if the base colour of polish is slightly different than the paint).  Finally I topped it of with a couple thin coats of top coat.

Note:  My pinky finger was done entirely with polish because I didn't have the shade of green I wanted in paint.  While you can do this entirely with polish I found it much easier with paint.  Not only that but I found the bumps were more more defined with paint.

What do you guys think of 3D nails?  Thoughts on creepy men?


Related Posts Plugin for WordPress, Blogger...